Here are the steps that I used to install a Kline exhaust on my 2021 Porsche Spyder. These steps would apply to a GT4 and most likely to a GTS 4.0 as well. Be warned, you should likely not be taking mechanical advice from me.
“I’m slow, but I make a lot of mistakes”.

Click here to read the blog post about the Jones family day at The Shop where the whole fam got together to work on the Spyder. If you haven’t already purchased your Kline exhaust, I highly recommend you reach out to Eric at Supreme Power for the best price and support. Now on to the specific step by step guide:
- Secure your custom hockey puck adapters under the car if you are lucky to have them. Work some magic to get the two-post lift arms under the car. Ensure you have enough clearance to avoid the lift touching anything other than your lift points or you will ruin your day before you get started.
- Carefully lift the car, checking for balance front to back and side to side with the wiggle test. If the car falls off when you wiggle it, it wasn’t secure.
- Use your expensive but underpowered Dewalt Impact Driver to remove the rear wheel nuts using a star pattern. Switch to a powerful air gun when you realize how underpowered it is for the job. Resist the urge to vroom, vroom the now much more powerful impact wrench. Okay, have some fun pretending to be on a F1 pit crew and then get back to work.
- Carefully remove the wheels, remembering they are very heavy, and be sure to clear your carbon ceramic rotors or face the wrath of millions of “I told you so” comments on Rennlist.
- Remove the 6 T25 torx screws holding on the center section of the rear diffuser.
- Pull/slide the diffuser straight back to disengage the 3 clips and set aside carefully.
- Optional – spray the 6 OPF and 10 muffler nuts with a small amount of WD-40 to help with removal.
- Let the WD-40 do its thing, give the exhaust time to cool, and go enjoy brunch with your family. Really the WD-40 was just an excuse to start the day with brunch.
- Remove the 10 nuts connecting the muffler to the OPF using a 12mm socket. Throw away the plans you had to use your impact driver because the space is way too tight and bust out your ratchets. A smaller air ratchet or impact wrench would have saved a lot of time.
- Unplug the vacuum lines from the valves on the muffler. They are tucked up high on the oem exhaust, but I was able to reach up and just pull them off, even with the clamp on them. Winning.
- Follow the vacuum line until you come to a clip. Remove it from the clips, 2 per side to make it easier to drop the rear section. You just push the top of the clip back and just slide the vacuum tube out…it will make sense when you see it, I promise.
- Using a tube clamp tool or wire cutters, cut the “ear” off the vacuum tube clamp and then pry it off with a flat head screwdriver and discard. Try not to imagine the hundreds of tube clamps you now own because you ordered a kit from Walmart. Maybe you will open a hose clamping business someday. Tuck the vacuum line out of the way for now.
- Remove the 2 muffler bracket bolts that secure the oem muffler in place using an E12 torx socket. Yes, another Walmart purchase you will likely never use again unless you get into the Porsche exhaust business.
- Remove the two muffler hanging nuts using a 12mm socket while holding the top hanging rods from spinning with an open box wrench. 20mm I believe.
- Pull the muffler back and down to remove. This took us a few tries to clear the bolts and get the angle right, but eventually it comes out. Along with some blood from hitting your head on countless sharp corners under the car. One person can carry it the oem muffler, but this step is so much easier with two people. It is much easier if you have already unplugged the vacuum line and removed it from the 4 clips in a previous step. That’s why they are numbered so don’t skip ahead!
- Locate the muffler gasket between the muffler and the OPF and set it aside in case you decide to reuse it. It may be on the muffler or the OPF. Using a razor or something flat, carefully remove the gasket if stuck.
- With the muffler on the ground, remove the cross-bar mounting bracket by removing 4 bolts, 2 on each side, using an E11 torx socket. You will need to use these bolts and some leftover nuts from the oem exhaust to install this bracket onto the Kline exhaust. I missed this step on my first install and had to return to finish the job.
- Remove the 6 13mm nuts, 3 from each side, connecting the OPF to the catalytic converter. The nuts may come off or in some cases, the nut and the stud will come out instead. This happened to me on 3 of the 6. I panicked because I thought had broken, but they had just come unscrewed. It depends on whether the nut or the stud gives in first. There’s a joke in there somewhere.
- If the studs come out, you will see there is a flat spot without threads. I was able to use vice grips to hold the stud and get the nut off without damaging the threads but I’m sure there was a better way. Be careful…you will need these for assembly…more on that later.
- Slowly and carefully remove the OPF without smacking anything. Those damn rotors!
- Locate the exhaust gasket between the OPF and Catalytic converter for re-use. It will most likely stay on the cat side but could be on either.
- Take a break, drink some water, think through the next steps, and hope it all goes back together! If you haven’t already been wearing gloves, I recommend them as you start to handle the Kline exhaust. Less to wipe down later and it makes you look like you know what you are doing. Until they rip and you are too busy to replace them…then you look a little crazy.
- Gasket decision time. Do you reuse the oem gasket between the Kline cross pipe and the catalytic converter or do you use the metal gasket provided by Kline? Because I was connecting to an oem part, I decided to re-use the oem gasket. It also just looked like a better gasket. I also asked random people around me, and the consensus was that I had no business doing this job myself with those dumb ass questions. Kline has later confirmed that you may use either.
- Note – I first attempted to use the supplied Kline hardware (nuts and bolts) to connect the cross pipe to the cat. After spending 30 minutes getting them inserted and tight, I found out they are too short. After several minutes of cussing and crying in the corner, I removed them and installed the Porsche studs. This mistake cost me a bunch of time, the respect of my children and some skin on my knuckles…don’t be like me.
- Mount the Kline cross pipe to the cat with the gasket of choice in between. Hand tighten the 6 13mm nuts, 3 per side.
- Install the oem cross-bar with the muffler mounting bracket onto the Kline exhaust. You will need to reuse the 4 torx bolts and some matching nuts and install this bar onto the Kline muffler, at the back of the long bracket with the Kline logo on it. It will make sense when you are looking at it. Or not if you are me and you will accidentally skip this step entirely and have to go back to fix it.
- I think you need two people for this next step but 3 is ideal. Or a transmission lift/table but who has one of those. Or like 4 arms. Where is Ganesha when you need them! Hold the Kline rear section in place and hand tighten the two 12mm nuts to the hanging rods. Remember that you need to stop the rods from spinning with a 20mm wrench.
- Decision time again. Do you re-use the Porsche gaskets or the supplied Kline gasket in between the cross pipe and the muffler? Because I was connecting two Kline parts, and I wasn’t 100% sure if the Porsche gasket would fit, I used the Kline gasket. It almost came down to a coin toss…not kidding. Kline says you may use either.
- With your gasket of choice in between, mount the Kline muffler to the cross pipe using the supplied Kline hardware. Hand tighten the 10 nuts.
- Take a break, drink some water and double check that everything is in place.
- Secure the cross pipe to the cat by tightening the 6 13mm nuts to 22lb torque. Exactly 22. You better get that right. Okay…confession. I couldn’t get the torque wrench to fit for one of the nuts so that one was “estimated”. Somewhere between hella tight and tight as f…never mind.
- Tighten the cross pipe to the muffler using the 10 12mm nuts, torqued to 22lb in a star pattern.
- Look at the exhaust tips to ensure they are centered. It helps to have someone hold the exhaust in place while another person tightens the 2 hanging support rod nuts to 17lb torque and don’t forget to keep the rods from spinning. Do I need to keep saying that?
- Tighten the 4 torx bolts holding the oem cross-bar to the Kline exhaust and the two torx bolts to connect the center mounting bracket to the car. I’m unsure of the exact torque spec so I’ll just say good and tight.
- There isn’t a lot of variability in how the Kline kit goes together or various pieces to align. Hopefully this means that things look good right away, because other than the hanging rods, I don’t see many ways to adjust it. Mine looked spot on…way to go Kline!
- Using a new hose clamp, attach the vacuum tube to the muffler and clamp it down. Or if you prefer, cap both the line and the valve intake and run in sport-mode all the time. You can also insert a M6 grub screw into the vacuum line and re-attach for the same effect although I’ve heard air can leak around the screw. If going this route, I would just cap them both off and secure the caps with small clamps. You do have all of those hose clamps after all but it might be time to order a set of hose caps.
- Install the exhaust tips, being careful about placement, centering and not sticking too far out and torque to 17lb. If they still move around, resort to tightening them until they know their place.
- Spray WD-40 on paper towels and wipe down the exhaust where it was touched to avoid fingerprints becoming a permanent part of the exhaust after the first heat cycle. Or let the fingerprints burn on as a theft recovery program. Or make fingerprint art.
- Lower the car but not all the way. Tell your 11-year-old, who has spent most of this time watching his older brother get to help, that you have a job only they can do. Have them climb into the car and fire it up…checking like 5 times to ensure you aren’t in gear. Crawl around the bottom of the car checking for any air leaks like you know what you’re doing. Burn yourself a few times and then sign off on your leak free install! Turn off the car.
- Install the rear diffuser with the 6 T25 torx bolts that you misplaced somewhere like 5 hours ago.
- Mount the rear wheels being super careful about those damn rotors.
- Lower the car and remove the lift pucks or they will fly out from underneath the car on the way home. You will be convinced that your new exhaust has just fallen off because you are a crappy mechanic and the car tailgating you will have a very bad day. No, this didn’t happen to me but I’ve heard stories.
- Torque your wheel bolts to factory spec (120) or the spec of your racing stud provider tells you (90-100) depending on which side of this raging debate you land on.
- Celebrate by doing donuts…or eating donuts…you do you boo-boo.
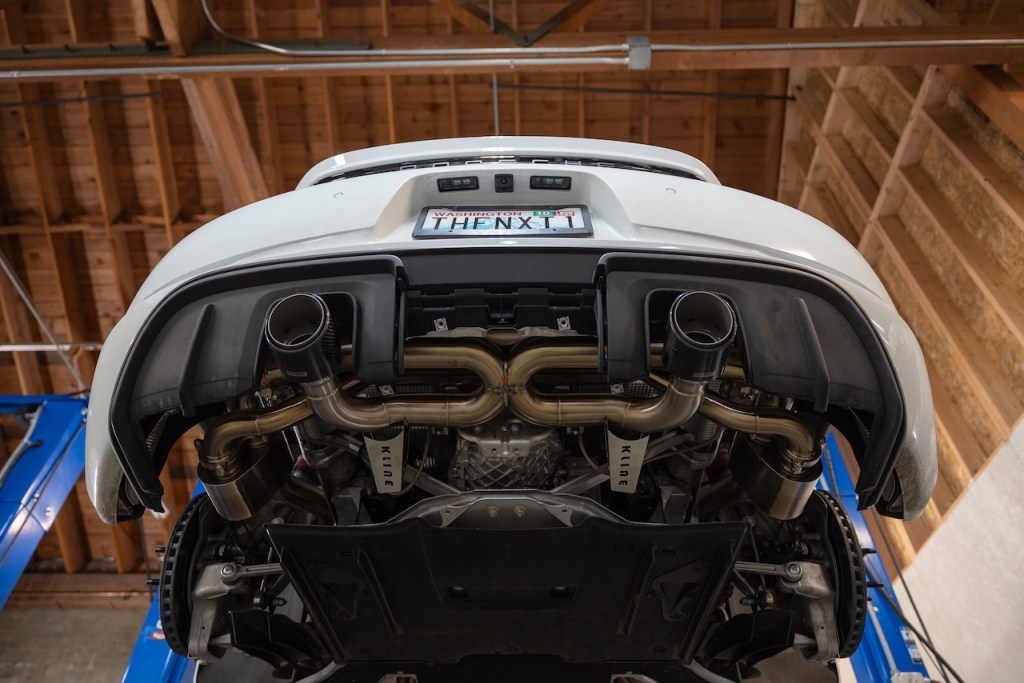
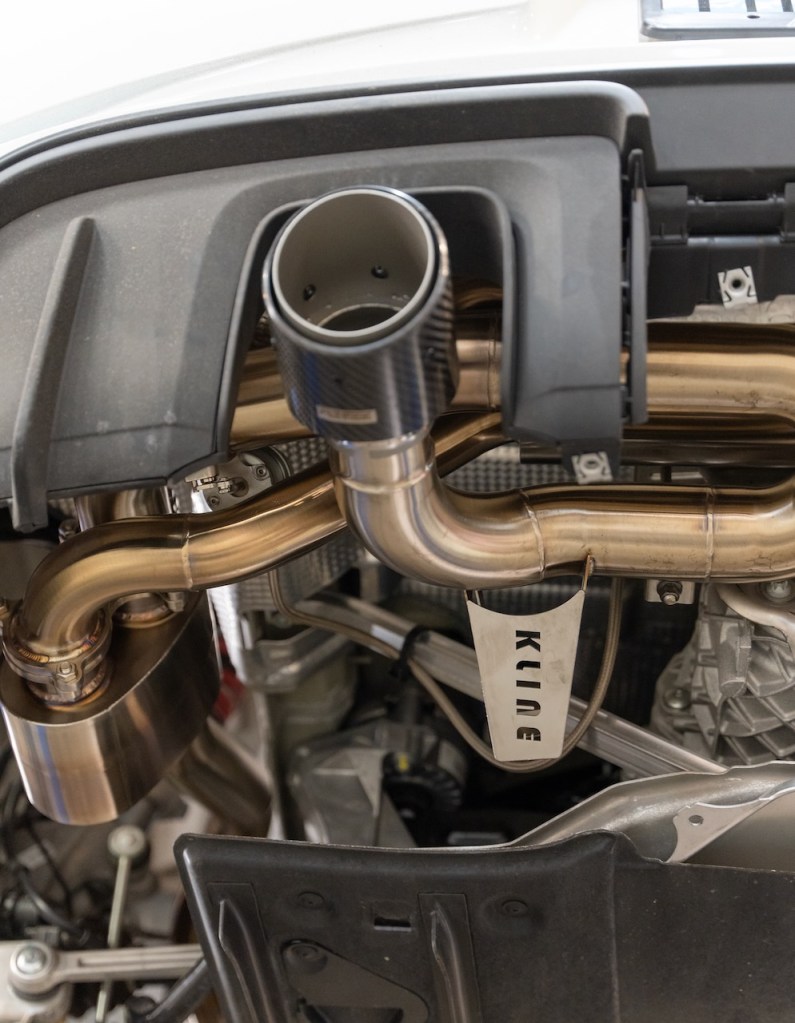
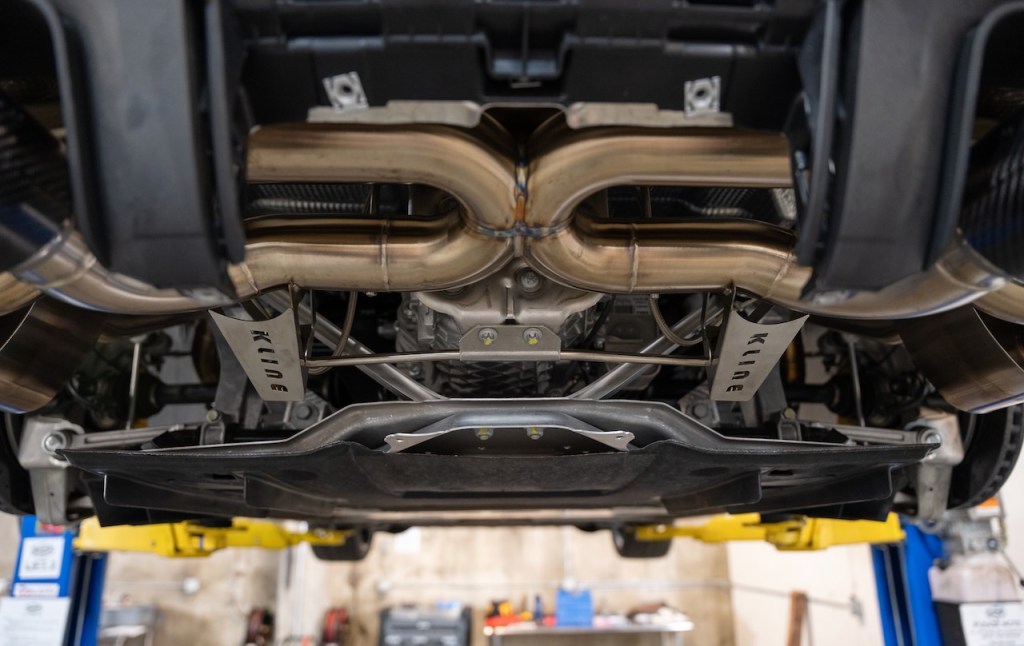
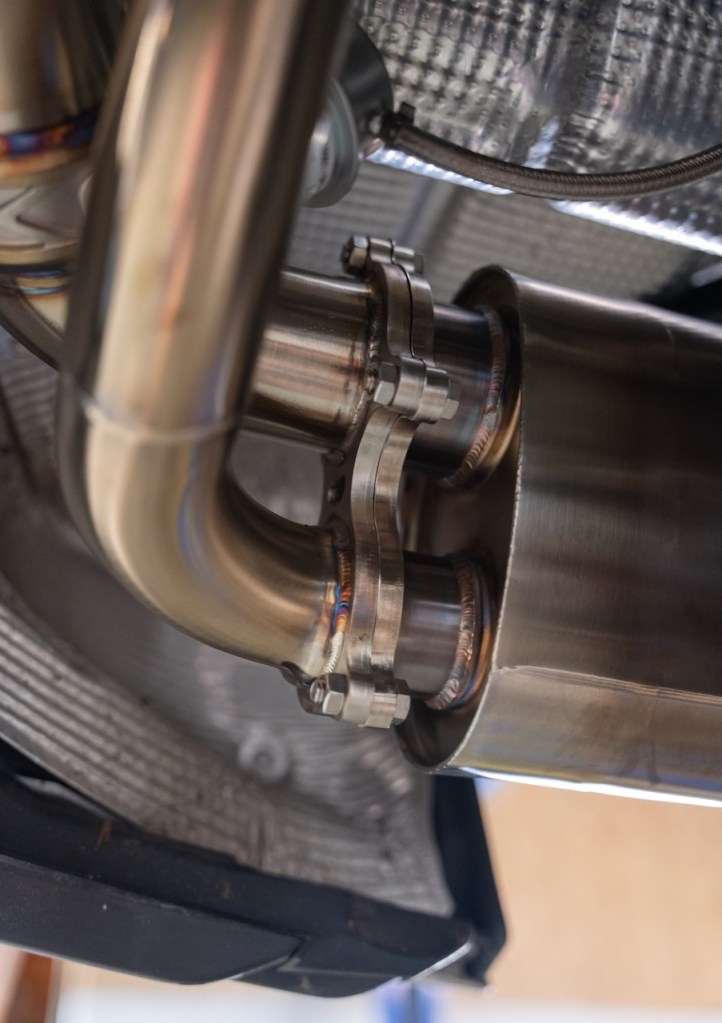
Here are some photos that I took when I went back and finished the job by installing the Porsche cross bar. You can see it clearly missing in the third photo and you can see the finished product in the 6th photo. Click the photos to enlarge.


We made it into the Spiel!:
